
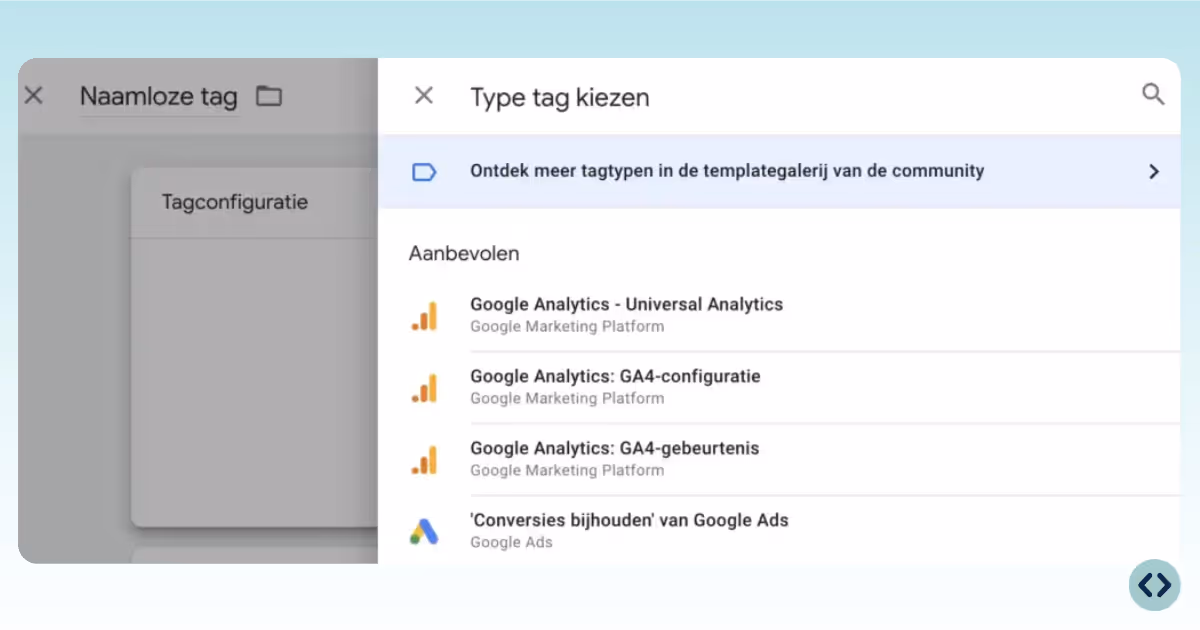
1. Click Tag Configuration and select Google Analytics: GA4 Event as the tag type.
2. Under Configuration Tag, select your existing GA4 Configuration tag.
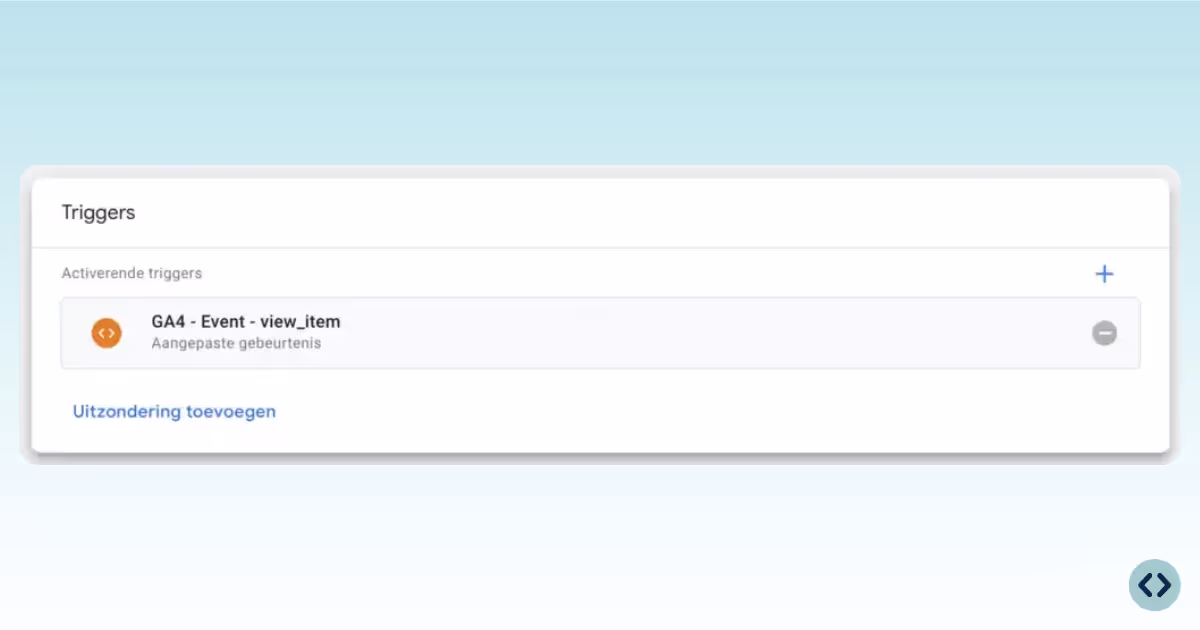
3. Enter the name of the event you want to track (e.g., purchase, signup, button_click). For dynamic event tracking, you can use a variable like {{Event}} to capture multiple event types.
4. Event Parameters (optional):
For e-commerce, you can use a trigger that listens for all relevant e-commerce events if you use {{Event}} as the event name.

Use GTM’s Preview Mode to verify that your event fires as expected and data appears in GA4’s Realtime or DebugView reports. Double-check this step within the full Google's documentation.
Once confirmed, Submit and Publish your GTM container changes.
You can find your GA4 Measurement ID in GA4 Admin → Data Streams. Select your web stream and the Measurement ID (formatted as G-XXXXXXXXXX) will be displayed at the top.
Yes. A GA4 Configuration tag must already be implemented in your web container before creating event tags. If you haven't set one up yet, follow the setup guide linked in the documentation before proceeding.
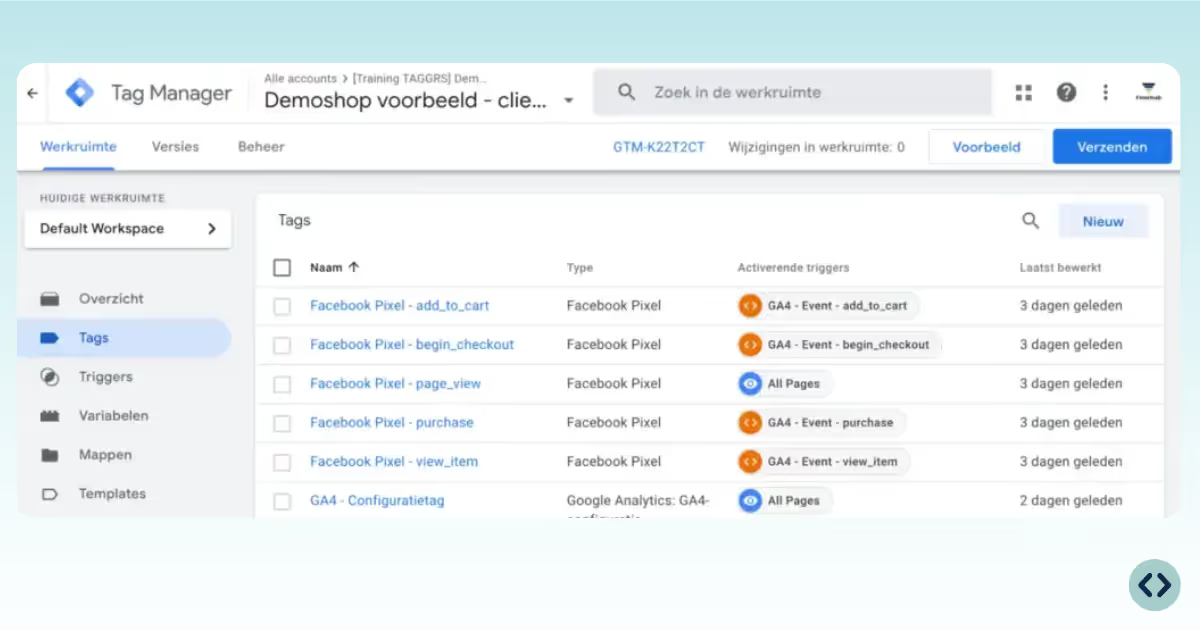
Use Google's recommended e-commerce events: view_item_list, view_item, select_item, add_to_cart, begin_checkout, add_shipping_info, add_payment_info, and purchase. These unlock GA4's built-in e-commerce reports and funnel analysis.
You can use custom names, but it's best to use Google's recommended event names for standard actions whenever possible. Recommended event names unlock GA4's advanced reporting features and are compatible with future GA4 updates. Use custom names only for interactions that have no recommended equivalent.
The data layer is a JavaScript object that temporarily stores information on your website and passes it to GTM. Using it ensures your event data is structured, reliable, and consistent. It also decouples your tracking logic from your website code, making updates easier to manage.
Use dataLayer.push() with your event name and an ecommerce object containing the relevant parameters. For example, a purchase event would include transaction_id, value, currency, and an items array with product-level details like item_id, item_name, price, and quantity.
Yes, always push { ecommerce: null } before pushing a new ecommerce event. This clears any previously stored ecommerce data from the data layer and prevents data from one event bleeding into the next, which can cause inaccurate reporting in GA4.
In your GA4 Config tag, point the server container URL to your TAGGRS subdomain instead of sending directly to Google Analytics. Your server container then handles the forwarding to GA4. Full setup instructions are covered in the TAGGRS server-side setup guide.
Yes. Since the event data is sent to your own subdomain rather than directly to Google's servers, ad blockers don't recognize it as analytics traffic. This results in higher event match rates and more complete data collection.
Use GTM's Preview Mode to test your tag. Once in preview, trigger the relevant action on your website and confirm the event fires in the GTM debug panel. Then check GA4's Realtime or DebugView reports to confirm the data is arriving correctly. Only publish your container after this is verified.
Check the following: your tag trigger is configured correctly, your GTM container has been published (not just saved), your GA4 Measurement ID is correct, and - if using server-side tracking - your server container endpoint is properly configured.
Make sure "Send e-commerce data" is enabled in your GA4 Event tag configuration and that your data layer is actually being populated with the ecommerce object before the event fires. Also verify that your variable mappings in GTM match the exact key names in your data layer.
This usually points to one of three things: the Measurement ID is incorrect or mismatched, the data layer variables aren't resolving to the expected values, or - in a server-side setup - the server container endpoint isn't receiving or forwarding the event correctly. Check each step in the data flow: Browser → GTM web container → TAGGRS server container → GA4.